Sunday, August 5, 2012

Awesome Framelit Storage!

I absolutely love the new framelits but I am not a fan of there storage.  I have to open the folder completely to remember what the framelit shapes are and the tape is a little bit of a pain, especially after several uses.  So I made myself a better case with some inspiration from a fellow paper crafter :)


First I took the cover out of the envelope and cut it so it was one sided and trimmed the edges downed a little being careful not to cut the words.


I slide the cover into an empty Clear Stamp Case that I bought from Stampin' Up!


I bought a roll of magnet that was sticky on one side.  I positioned it in the case on the back of the label.  How much and what direction depends on what framelits you are putting in the case.


Here it is with the Holiday Collection Framelits.  The framelits "adhere" to the magnets well.


I put the magnet on the label side so when the case is closed, I can see my framelits through the back.


I added a label to the spine so that I could store them with my Clear Stamp Sets.


In case you are wondering, my stamp holders are DVD racks from IKEA.


The Floral Frames Framelits is a tight fit in the case but if you slide it down a little bit so the petals are straddling the case locks it will fit.

Thursday, August 2, 2012

Make-N-Takes from the Hilton Event

This weekend I sat down and finished my swaps from convention. I did better this year of getting most things done but I did still run out of time. There was also a couple things I didn't do to make it easier to travel. Make-n-takes are my favorite because we get to play with products we may not have!

Along with convention, I also attended an event hosted by Lisa Rodriguez at the Hilton on Tuesday. She had a swap you could participate in, lunch, lots of adorable gifts, and make-n-takes! We had so much fun at this event and it was such a gray way to kick off convention week!

Check out the great make-n-takes we got to do!


this was a bag topper and the bag had graham crackers, Hersey's chocolate, and a snowman marshmallow but they made the trip home in my belly :D

Friday, July 27, 2012

Join My Family!

Join My Stampin' Up! Family! 

Why should you join me?  I am SO GLAD you asked!
  • While the $99 Starter Kit price tag is exciting in and of itself, one of the biggest perks of the new Starter Kit is its flexibility! So you get a great deal on Starter Kit products that you get to choose yourself!
  • You get a 20 percent discount on all Stampin' Up! products as a demonstrator!
  • You get FREE access to Stampin' Connection a site for demonstrators to network, inspire, and share!
  • You get invitations to Stampin' Up! events like Convention that I just returned from.  You can go with me next Year!
  • You have access to products a month BEFORE everyone else with sneak peeks
  • You can earn FREE product!
  • You will receive a FREE demonstrator magazine filled with beautiful photos and project ideas every month!
  • In addition, new demonstrators are eligible for TWO FREE months of Demonstrator Business Web Services (DBWS)-including your own business website and Online Store, access to a blog, calendar, a monthly e-newsletter, project gallery, and e-cards-if you sign up within 21 days of becoming a demonstrator!
  • If you sign up in August, you will receive the FREE Howl-o-ween project kit that isn't offered anywhere else!


Contact Me Today!

Nicole Black
Stampin' Up! Demonstrator


Thursday, July 26, 2012

Howl-O-Ween Printer Tray Promotion!


During the month of August, all new demonstrators will receive a FREE Howl-o-ween Printer’s Tray project kit! This boo-tiful kit contains all the bits and pieces to create a super spooky Halloween decoration!

Contact me today to sign up!

Nicole Black
Stampin' Up! Demonstrator

Contact me
nicolebstampin@gmail.com

See what I am up to
http://nicolebstampin.stampinup.net/
http://nicolebstampin.blogspot.com/

Chat with me
http://twitter.com/nicolebstampin
http://www.facebook.com/home.php#!/nicolebstampin?ref=profile

Join me
http://www.stampinup.net/esuite/home/nicolebstampin/startyourownbusiness
password is nicolebstampin

Sunday, July 22, 2012

Convention 2012 Swap - Simple Ribbon Rosette Technique

This post is a tutorial on a Technique that I did to create a technique card for a swap. Here I will show you how to create Rosettes using Ribbon.

Materials
3/8” Whisper White Taffeta Ribbon (or any other ribbon of your choice)
hot glue gun or needle and thread

Instructions
Cut a piece of ribbon about 13” or so. If the ribbon is thicker you will want it longer. The longer the ribbon is the larger the rose will be.  Find the middle of the ribbon and fold it down to make a right angle.


Fold the ribbon back and forth, keeping the L shape. It’s okay if the stack of folds starts turning as long as you keep the right angle as you’re folding.


Keep folding it over itself until all the ribbon is used up.


Slide you finger into the last folded section. Hold tight to the 2 tails and let the rest go. You will have what kind of looks like a braid.


Choose one of the two tails you are holding. Gently and slowly pull that tail through your fingers leaving the other tail alone. It will begin to fold down onto itself until it becomes a rose!


Now you have two options: you can sew it or hot glue it to keep it from unfolding. I find sewing easier. Just stick a needle and thread in a couple of times and knot it.


Now cut off the tails of ribbon and you’re done! If you use Whisper White ribbon, you can use re-inkers and water to dye it or markers to color it.


Saturday, July 21, 2012

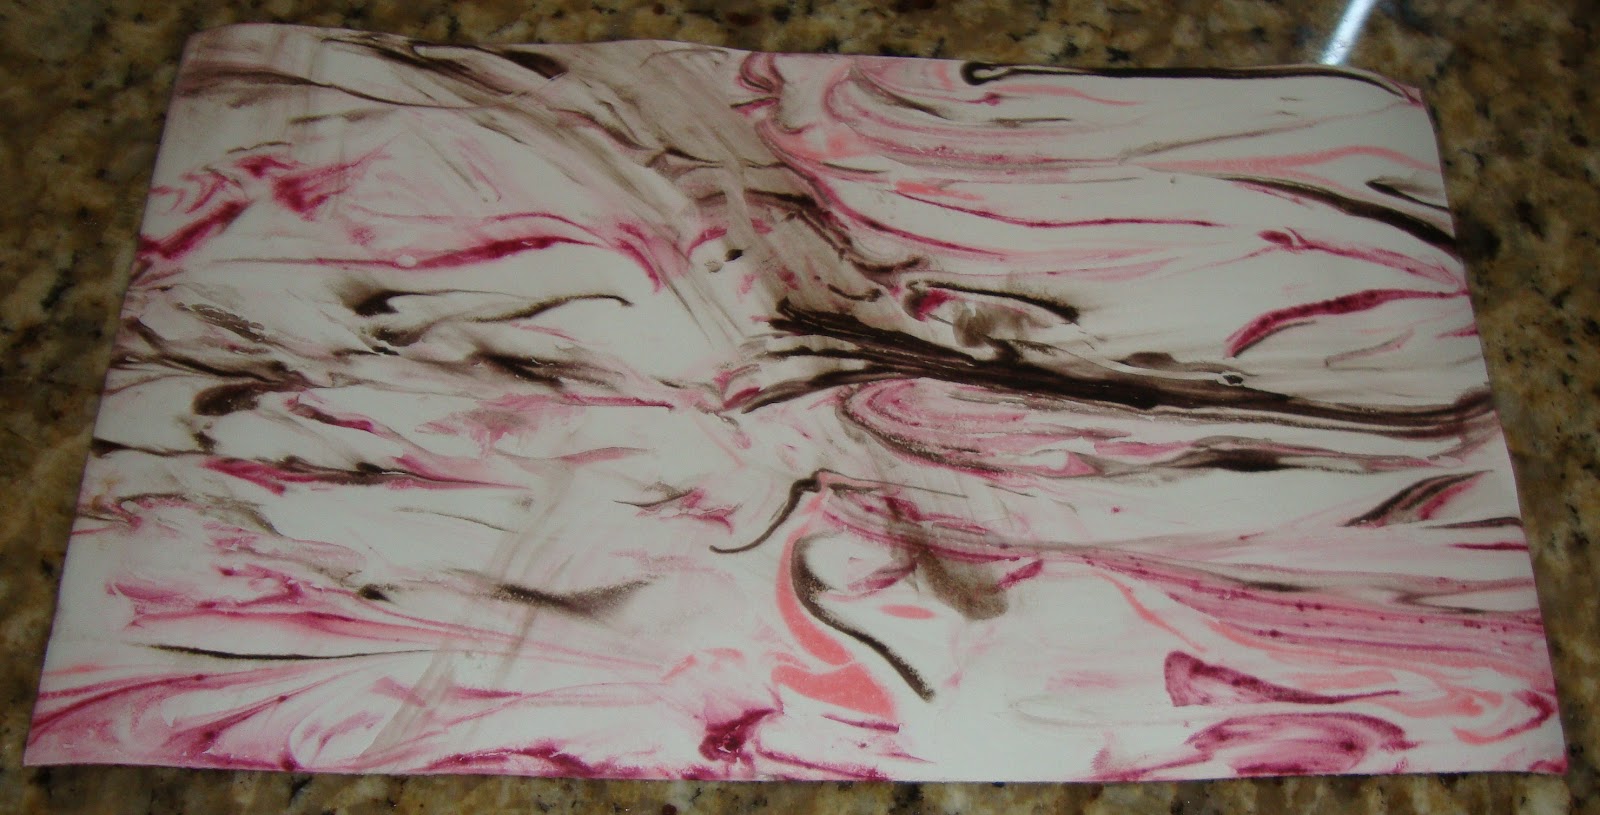
Convention 2012 Swap - Shaving Cream Technique

This post is a tutorial on a Technique that I did to create a technique card for a swap.  Here I will show you how to create backgrounds using Shaving Cream.

Materials
2-3 different color reinkers
Whisper White Cardstock or Glossy White Cardstock
shaving cream (not the gel kind)
paper plate
lots of paper towels
a stick/utensil/tool that you do not mind getting ink on.

Instructions:
Fill a paper plate with shaving cream.


Even it out a little bit with a stick, utensil or tool. Make sure the shaving cream is spread out enough to fit the size of your cardstock. Add approximately 4-7 drops of two or three different reinkers.  I used Rich Razzleberry, Early Espresso, and Pretty in Pink.


Swirl gently to make whatever pattern you want in the ink. Be careful not to swirl too much or your colors will become messy.


Take your cardstock and place it face down in the shaving cream. Press it down lightly to make sure the entire cardstock is touching the shaving cream mixture.


Let it set for a couple of seconds. Remove the cardstock from the shaving cream.


With a paper towel wipe away the excess shaving cream.


Set aside to dry. Once dry you are ready to use it in your card.


Here I punched out flowers to use with the Blossoms Punch and the Boho Blossoms Punch.

Friday, July 20, 2012

Convention 2012 - Tea Light Holders

I hosted a swap at convention this year, a Bling Swap.  I provided bags for the cards and this cute little gift to each of the participants.  It is very easy to make!


Materials
2 soda cans
tools to cut open the can (I used pruning sheers)
Big Shot
Flower Folds Die
Sticky Strip

Instructions
First cut the can apart by cutting off the top and bottom and then through the middle so it can lay flat.  I actually used pruning sheers to cut it.  Be very careful not to cut yourself with the can as it is very sharp.  I bought a pair of mechanic gloves from an automotive store.  These keep the can from cutting me.


Lay the can on the Flower Folds Die and run it through the Big Shot.  I used the second and third largest flowers on the die for this project.


Here is the second largest flower after it is cut out.  Once it this cut the edges will not cut you.


On the larger flower, I place the design face up and folded the petals upward.


Repeat the process for the smaller flower but put the pattern face down and fold the petals upward.  I then put a small piece of Sticky Strip on the bottom of the smaller one and then adhered it to the larger flower to help keep it in place.