Monday, October 24, 2011

Poinsettia Tree

There are only 61 days 'til Christmas!  I am officially starting my Christmas posts!  I know that my last post was a Christmas Advent Calendar; however, that was under the guise of a Thanksgiving gift.  I LOVE Christmas time and I am counting down the days till I can start decorating.  My husband is making me wait till Halloween is over (I guess that is reasonable).  I am even more excited this year as I will be decorating my very own house!  Last year we moved in on December 29th so this will be the first time!

I think this card is one of my favorites this holiday season.  Though I got so many wonderful ideas at Convention (are you sick of hearing that yet), I am just in love with every holiday card I make!  Be sure to let me know which ones you love as I post them up!

This card is surprisingly simple and very elegant.


The technique is Emboss Resist with the Big Shot.  I introduced this technique here; however, this has a twist.  Instead of leaving an embossing void, we are specifying a shape we want embossed.  First, cut out a triangle from cardboard for the size of the Christmas tree you want on your card.


Using Dotto, adhere the triangle to the outside of your Embossing Folder.


Put your Whisper White Cardstock in the embossing folder and layer it as follows:  Multipurpose Platform, Embossing Folder with cardboard side down, Cutting board.  Run this through the Big Shot.


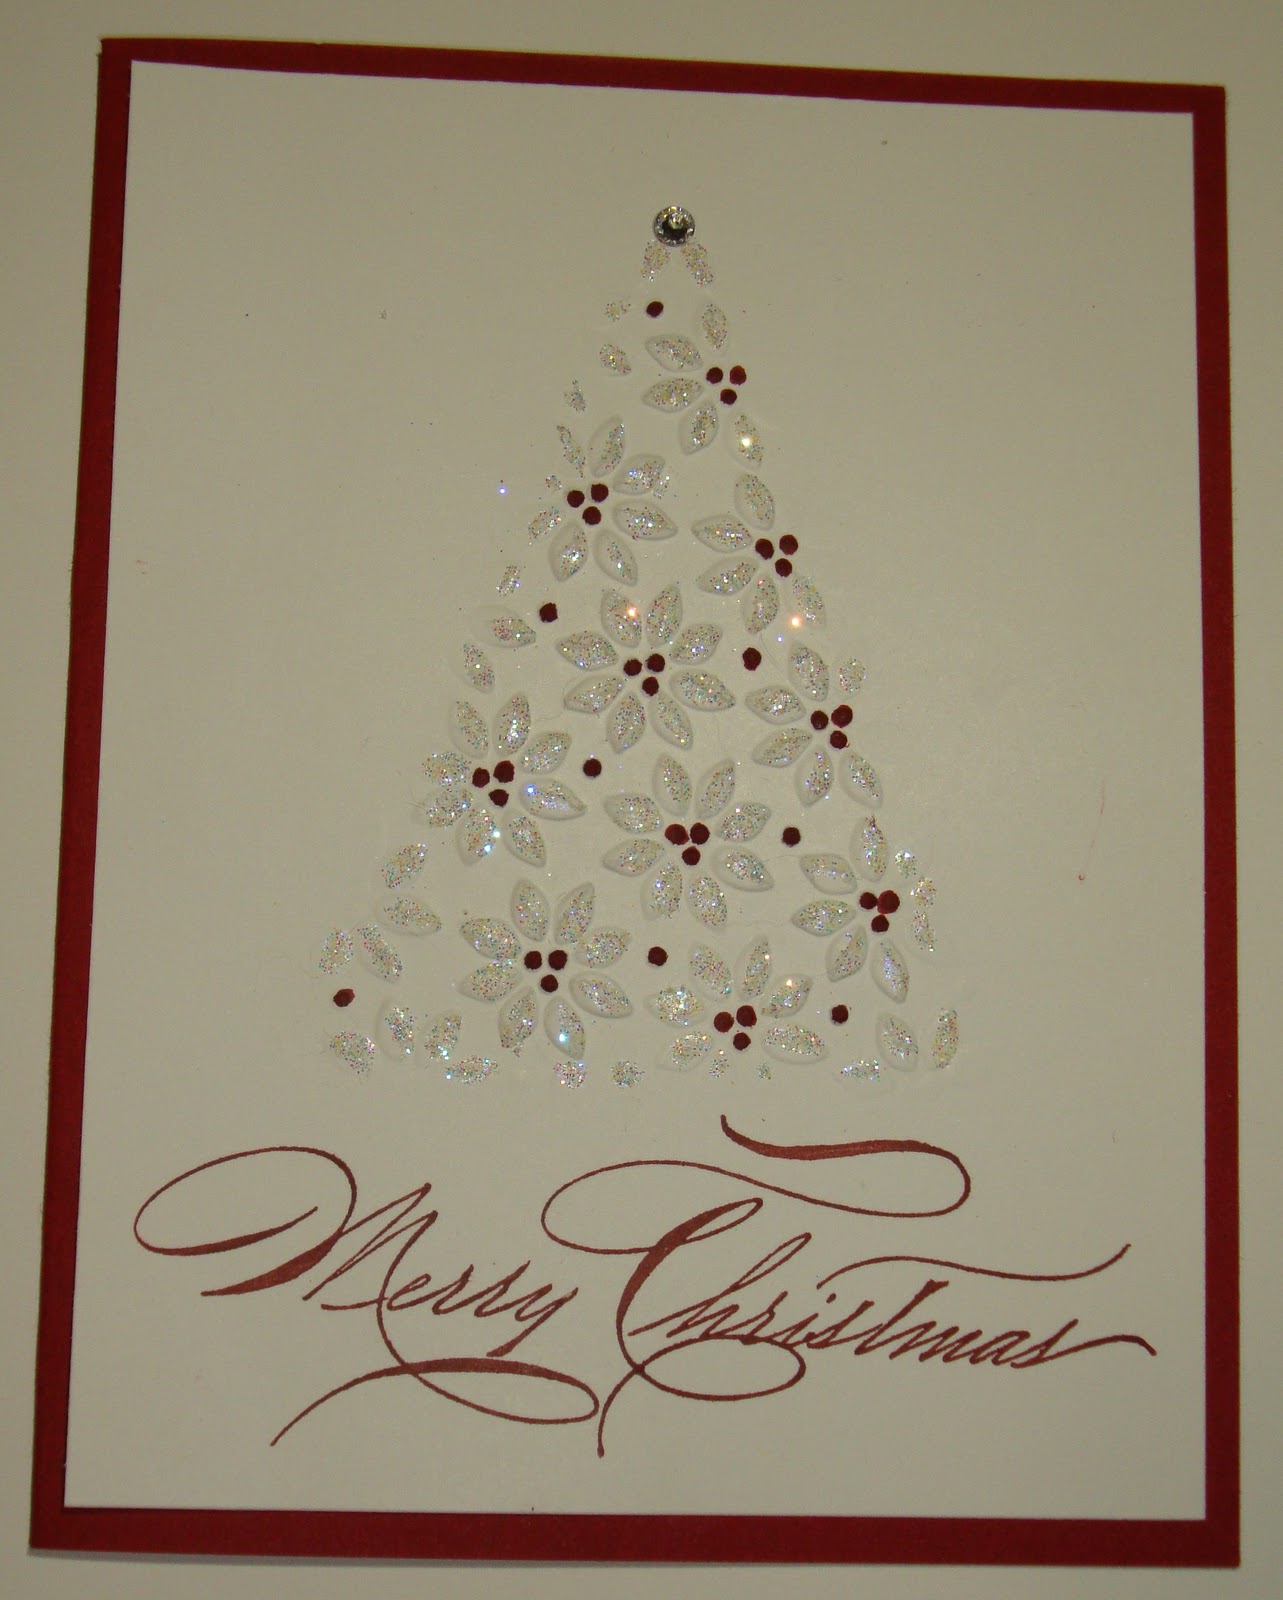
When you remove your cardstock, only the triangle will be embossed!  Love it!


Use a Cherry Cobbler marker and color over the dots on the tree.


Using Dazzling Details, add glitter to each of the poinsettia petals of the tree.


Stamp your saying and add a Rhinestone on the top of the tree as a star.  Adhere the Whisper White to a Cherry Cobbler card base to finish it off.


Supplies:
Stamp Set(s) - Hand-Penned Holidays
Card Stock - Whisper White, Cherry Cobbler
Ink - Cherry Cobbler Marker
Accessories - Big Shot, Petals-A-Plenty Embossing Folder, Dotto, Dazzling Details, Basic Rhinestones

Thursday, October 20, 2011

Christmas Bingo Advent Calendar

I like to give a little something to my mother, mother-in-law, Thanksgiving hostess, etc at Thanksgiving.  This project would make a great Thanksgiving gift.  It uses the Letters to Santa DS.  This was demonstrated at Convention, and of course, I had NEVER thought of using the Christmas Bingo as an Advent Calendar!  So cute! 


Take a design of your choice and, with the design on the left, score it with your Simply Scored at 4-1/4" and 10".  On each of the corners you want to cut off a section at an angle from the edge to the score mark.  On the design side, start your angle cut at 3/4".  On the plain side, start your angle cut at 1".


Fold on the score lines making sure your design is on top.  Adhere a 5/8" Satin Ribbon around the belly.  I used Sticky Strip on the back to hold it in place when it was not tied.

In the center attach on the the Bingo Boards.  On the right attach a Cellophane Bag to hold the countdown pieces. 


Here I used the 25 & Counting set and punched them out with the 1" Square Punch.  However, you could use Christmas images, buttons, candy or anything else to act as your place markers.


So easy and very cute!  You can make 8 Advent Calendars from 1 package of Letters to Santa DS!

Supplies:
Stamp Set(s) - 25 & Counting
Card Stock - Whisper White, Letters to Santa DS
Ink - Riding Hood Red, Old Olive, Marina Mist, Early Espresso, Blushing Bride
Accessories - Sticky Strip, 5/8" Chocolate Chip Satin Ribbon, Dimensionals, 1" Square Punch, 3" x 5" Cellophane Bag, Simply Scored

Monday, October 17, 2011

Give Thanks

Before we move into Christmas, I wanted to give you at least one Thanksgiving card.  I have to admit that Thanksgiving often gets over looked in my craft room.  Once I wrap up Halloween, I am just so excited I just straight into Christmas!  But this year, I did slow down and make a Thanksgiving card.  I had to as I was so inspired by the wreath in the Warmest of Wishes set!  Plus I had a perfect scripted saying from the Hand-Penned Holidays set!

(sorry the colors are so bad in this photo)

I used my markers and inked the leaves individually.  It takes time but gives a great fall look!

Supplies:
Stamp Set(s) - Warmest of Wishes, Hand-Penned Holidays
Card Stock - Soft Suede, Naturals Ivory, Lucky Limeade
Ink - Markers: Early Espresso, Soft Suede, Pumpkin Pie, Always Artichoke, Daffodil Delight
Accessories - Dimensionals, 2-3/8" Scallop Circle Punch, 1-1/4" Circle Punch, Big Shot, Perfect Polka Dots Embossing Folder

Thursday, October 13, 2011

Halloween Bat

I swapped for an adorable card like this at Convention.  I knew immediately I needed to do this for Halloween.  So Cute!


The bat is actually very easy.  The body and eyes are from the Owl Punch (just trim those feet off).  The wings are the 1-3/4" Circle punch cut in half and then punched at the bottom three times each with the 1/2" Circle Punch.

Supplies:
Stamp Set(s) - Teeny Tiny Wishes
Card Stock - Crumb Cake, Pumpkin Pie, Basic Black, Whisper White
Ink - Basic Black, Pumpkin Pie
Accessories - Word Window, Modern Label, Big Shot, Spider Web Embossing Folder, Dimensionals, Owl Punch, 2-Way Glue, 1-3/4" Circle Punch, 1/2" Circle Punch

Monday, October 10, 2011

Halloween Pumpkin

I made this card with a Halloween Birthday in mind but then quickly realized you could change the Basic Black to Early Espresso or another shade of Brown and it becomes a Thanksgiving card!  How will you use it?

The pumpkin is as easy as punching out 5 ovals and glueing them together.  I sponged the edges of each of the ovals first for some added contrast.  The stem is a stamp from the Pines and Poinsettias set.


Got to LOVE the Boho Blossoms!  I distressed them by bending a lot to give them dimension and the glued them all together with single glue dots to allow the petals freedom.


Supplies:
Stamp Set(s) - Pines & Poinsettias, Teeny Tiny Wishes
Card Stock - Whisper White, Pumpkin Pie, Basic Black, Pear Pizzazz
Ink - Pumpkin Pie, Pear Pizzazz, Basic Black
Accessories - Sponge Daubers, Large Oval Punch, Word Window Punch, Modern Label Punch, Boho Blossoms Punch, Dotted Scallop Ribbon Border Punch, 3/16" Corner Punch, Glue Dots, Dimensionals

Thursday, October 6, 2011

Happy Halloween

I got this idea from Shelly herself at convention.  The Festive and Fun set is well named!  Cant wait to use it for Christmas and Valentine's Day too!


I stamped the words with StazOn Black and then "painted" away with my blender pen!


Supplies:
Stamp Set(s) - Festive & Fun
Card Stock - Basic Black, Cajun Craze, Frightful Sight DS, Whisper White
Ink - StazOn Black, Old Olive, Cajun Craze, Wisteria Wonder
Accessories - Blender Pen

Monday, October 3, 2011

Another CUTE Halloween Treat!

I have been working on my treat handouts.  Here is another very cute Halloween treat holder.  I gave this out to anyone who brought a friend to my last Stamp-A-Stack!

First cut 2 tags and a rectangle of 5" x 2-3/4"
Cut 5/8" off bottom of the tags
Score the Rectangle: long ways at 1-1/8" and 3-7/8"; short ways at 1/2" and 2-1/4"
Cut on the small folds in the center from the edge to the 1/2" score line
Apply Sticky Strip to the side flaps
Fold up to form the frame of the box
Adhere the 2 tags

I added this cute decoration to the front!  And tied the top with Seam Binding.

I used the same paper to wrap 6 Hersey nuggets to go inside.

Supplies:
Stamp Set(s) - Howl-O-Ween Creeps
Card Stock - Frightful Sight DS, Basic Gray, Old Olive, Cajun Craze
Ink - Basic Black, Old Olive, Cajun Craze
Accessories - Old Olive Seam Binding, Big Shot, Two Tags Bigz Die, Scallop Square Punch, 1-1/4" Square Punch, Dimensionals, Sticky Strip, Simply Scored