Thursday, September 19, 2013

Gorgeous Flowers

This was my card for my Downline Swap.  Again, the "rules" were to use Wisteria Wonder, Pool Party, and Crushed Curry.  I am ABSOLUTELY IN LOVE with Gorgeous Grunge so I am always looking for ways to use it!


Supplies:
Stamp Set(s) - Flower Shop, Gorgeous Grunge, Lacy & Lovely
Card Stock - Pool Party, Wisteria Wonder, Whisper White
Ink - Crushed Curry, Pool Party, Wisteria Wonder
Accessories - Pansy Punch, Basic Pearls, Dimensionals

Monday, September 16, 2013

Its a Washi Christmas

This is a fast but ADORABLE Christmas card!  This was a swap from Convention.  It is pretty straight forward so I am not going to babble on and just let you enjoy!  (Sorry for the glare on the pic).


Supplies:
Stamp Set(s) - Sassy Salutations, Mosaic Madness
Card Stock - Old Olive, Whisper White, Cherry Cobbler, Seasons of Style DS
Ink - Cherry Cobbler
Accessories - Seasons of Style Washi Tape, Mosaic Punch, Curly Label Punch, Dimensionals

Thursday, September 12, 2013

Splatter Birthday

Sorry my posting has dropped off.  I started up the Fall semester with two grad course at FGCU on top of working full time.  I am starting to get into the swing of things so lets see if I can get back on track. 

This card is a swap from convention.  Sadly I don't have the creators name :(  This technique is a lot of fun but don't do too many at once our you'll pass out!  Start by point two or three drops of one color reinker in the middle of the card.  Using a straw, blow the ink toward the edge.  Repeat with three more colors!  Here are some tips: 
  • Keep the drops centered and then put a label over the mess you make (and you do make a mess :)
  • Have your cardstock bigger than what you want as a finished product and then trim down each of the four sides once dry.  Sometimes the ink pools at the end and it look a little messy, this way you cut it off!
  • Let each color have a minute to dry before starting the next color just in case you have overlap. (like I did with the Marina Mist and Calypso Coral)
  • Careful not to spit down your straw!  (yew grossness!)
  • Watch your work space, I got carried away and blew ink on another card :(
  • Have FUN!


Supplies:
Stamp Set(s) - Label Love
Card Stock - Whisper White, Calypso Coral
Ink - Calypso Coral, Wisteria Wonder, Marina Mist, Pear Pizzazz reinkers; Calypso Coral pad
Accessories - Artisan Label Punch, Dimensionals, straw

Thursday, August 22, 2013

Six-Sided Wreath

Here is the other cool design that was demonstrated in the Convention Class.  What a GREAT Christmas Card!  The first ring is done exactly like the petals of the sunflower.  The second ring is brought in a little and off set.  I just used a Cherry Cobbler marker to add the holly berries.  The Very Vanilla is mounted to the Cherry Cobbler just like the sunflower card as well.  I sponged the front of the Very Vanilla with Soft Suedy to give to a texture.  Enjoy!


Supplies:
Stamp Set(s) - Six-Sided Sampler, More Merry Messages
Card Stock - Very Vanilla, Cherry Cobbler
Ink - Gumball Green, Soft Suede, Cherry Cobbler
Accessories - Hexigon Punch, Sponge, Sponge Dauber, Dimensionals, Glue Dots, Cherry Cobbler Seam Binding

Tuesday, August 20, 2013

Six-Sided Sunflower

I am excited to show you some fun creations with the Hexigon Punch and Six-Sided Sampler set.  Today's post and the next post show you two ideas that I saw done at convention at the 5 Projects to Increase My Sales class.  So CUTE!

Love this sunflower!


I put 5 hexigons down then stamped my stem.


Then added the last hexigon to hide the top of the stem.


I was excited to see the leaves done!  First stamp and punch a hexigon.


Then, using you snips, cut two lines and it will look like this.  Then take the diamonds as your leaves!


 I love to have a dark card base but then you have to use more cardstock on the inside so you can have your saying and write a message.  Here is another way to do it.  My Whisper White was actually cut to 8" x 5" and folded in half.  Then mount it on a piece of 5-1/2" x 4-1/4" piece of Early Espresso.  Voila! A white inside card that has a dark base!  A little twist and So much fun!


Supplies:
Stamp Set(s) - Six-Sided Sampler, Too Kind
Card Stock - So Saffron, Early Espresso, Whisper White, Soft Suede
Ink - Crushed Curry, Early Espresso, Wild Wasabi
Accessories - Hexigon Punch, Snips, Dimensionals

Saturday, August 17, 2013

My Paper Pumpkin and Beyond

Haven't joined My Paper Pumpkin yet?  Why Not!  Every month you will get a kit of stamps, ink, paper, and embellishments to make a project. My Paper Pumpkin is only $20 a month (including shipping). And even better, if you sign up before August 31st, the first 2 months are only $10 (just use promo code pumpkin deal). Go to https://mypaperpumpkin.com?demoid=2038542 to learn more and sign up!

 Here is the card made as the kit instructions say to.


Here I stepped up my kit with a few things I had laying around my craft room.


Supplies:
Stamp Set(s) - My Paper Pumpkin Kit
Card Stock - My Paper Pumpkin Kit, Whisper White
Ink - My Paper Pumpkin Kit, Cherry Cobbler
Accessories - My Paper Pumpkin Kit, Daffodil Delight Seam Binding, Artisan Label Punch, Small Heart Punch, Dimensionals, Hang Up Cute Clips

Thursday, August 15, 2013

Butterfly Grunge

Remember how I said I LOVED Gorgeous Grunge?  Check out this card using it.  This was demonstrated at Convention and I thought it was absolutely BEAUTIFUL!

Tips:
The Bermuda Bay Grunge is stamped off first and then stamped onto the card base but the words are not.


I did not stamp off any of the grunge on the butterfly.  The edges are the direct to paper technique where you rub the butterfly directly on the Crushed Curry Ink Pad.


Supplies:
Stamp Set(s) - Gorgeous Grunge, Sweet Essentials
Card Stock - Whisper White, Bermuda Bay
Ink - Bermuda Bay, Crushed Curry, Tangerine Tango
Accessories - Big Shot, Bigz Beautiful Butterflies, Glue Dots, Designer Vintage Faceted Buttons, 1/8" Silver Ribbon

Tuesday, August 13, 2013

Envelope Pocket Card

This card was demonstrated at one of the sessions at Convention.  It was such a great idea I had to make it for myself.


The envelope creates cute pockets for messages and more!


Here I used a glue dot to adhere a gift card to a tag.  That way when they pull the tag the get the surprise of a gift card!


So Awesome Right?  This card uses the Envelope Liner Framelits, let me show you how.

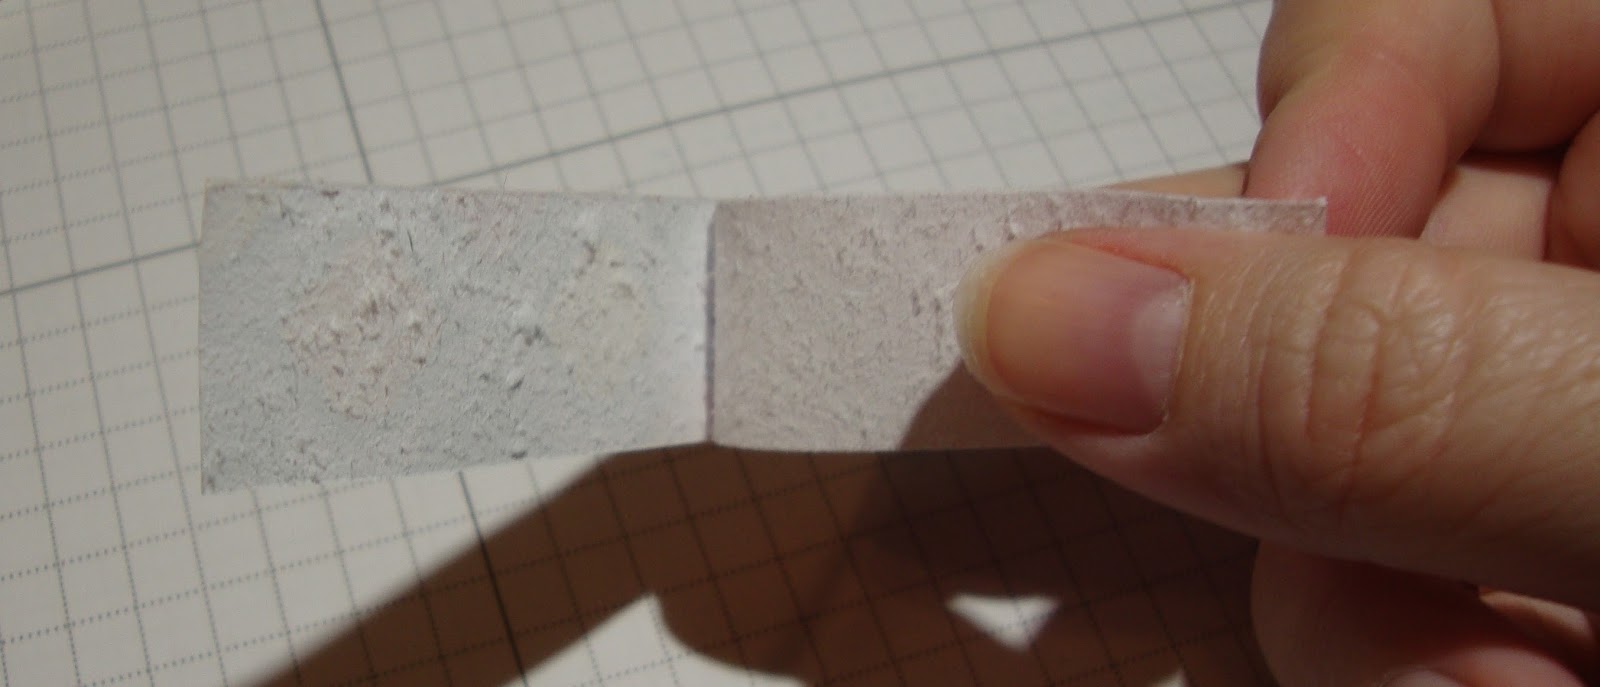
You are going to use the middle liner and Designer Paper of your choice for the small envelope on the front of the card.  Follow the template below to prep the liner.


Once you have done so, your paper will look like this.


I folded down the flap and adhered it with just a little bit of adhesive in the middle.  I didn't completely glue it down so to give the look of a flap that opens.  I then cut a banner, stamped the words I wanted and adhered it to the flap.


The card base I ran through with an Embossing Folder to give it some texture.  It is your choice if you want it to be a full card or just a front.


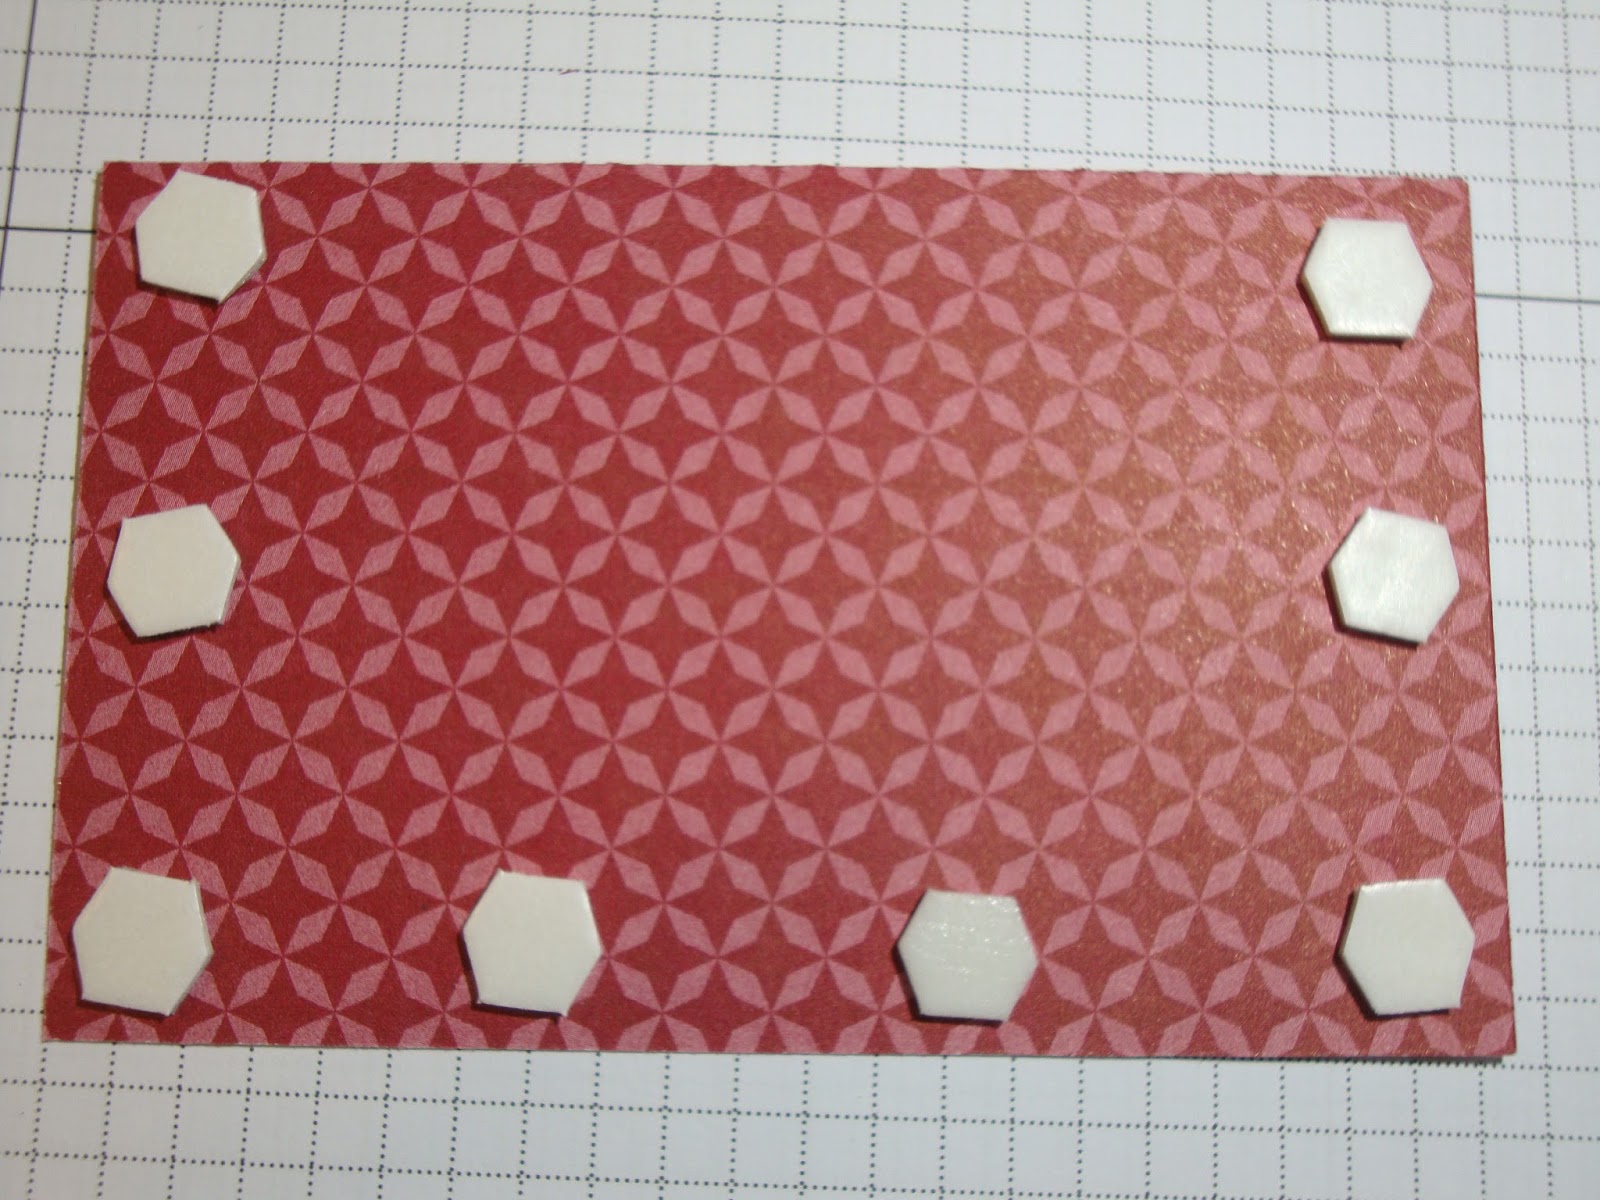
On the back of your mini envelope, put Dimensionals on three sides, leaving the top open.  This will give you your envelope pocket.  Note:  Make sure to put the Dimensionals all the way to the side or use the edges of the Dimensionals or your Gift Card wont fit.  (This picture, when I put it all together, the g.c. didn't fit and I had to redo it, oops!)


Adhere the envelope to the front of the card.  And then add any tags you want!


Of course you should use the largest Framelit to line your envelope to match!


Here is the same card with different Designer Paper for a birthday card.


Supplies For Christmas Card:
Stamp Set(s) - More Merry Messages, Tag It
Card Stock - Seasons of Style DS, Whisper White, Old Olive, Crumb Cake, Cherry Cobbler
Ink - Cherry Cobbler
Accessories - Big Shot, Envelope Liner Framelit Dies, Cheveron Embossing Folder, Chalk Talk Framelits, Dimensionals, Cherry Cobbler Seam Binding

Supplies For Birthday Card:
Stamp Set(s) - Best of Birthdays
Card Stock - Epic Day DS, Whisper White, Daffodil Delight
Ink - Tangerine Tango
Accessories - Big Shot, Envelope Liner Framelit Dies, Cheveron Embossing Folder, Dimensionals

Saturday, August 10, 2013

Washi Tape - Part 3

Our final Washi Tape effect is making your own "Washi Tape".  As you can see in my card, I made Washi Tape out of the Quaterfancy DS.  You can use any paper but it works best with Designer Series Paper.


First cut a strip of DS.  It can be as long as you want but it should not be wider than the Scotch Tape you are going to use.


Cover the side you want to show with Scotch Tape.


Using your Bone Folder, rub over the strip of paper on both sides to break down the fiber.  This happens very quickly.


Pull off the layer that does not have the Scotch Tape on it.


In the white side, rub a damp sponge so that all the white paper comes off.


See how it just rubs off leaving the pattern behind?


When your done you homemade Washi Tape is clear except for your design!  Unlike real Washi Tape, it is not self-adhesive so use adhesive to adhere it to the card.


Supplies:
Stamp Set(s) - Sassy Salutations
Card Stock - Quaterfancy DS, Whisper White, Pumpkin Pie
Ink - Island Indigo
Accessories - Itty Bitty Punch Pack, Basic Rhinestones, Bone Folder, Sponge, Glue Dots, scotch tape

Thursday, August 8, 2013

Washi Tape - Part 2

In this post, the Washi Tape effect is with stamping.  Stampin' Up! Has a set called Tape It which is different lengths, widths, and patterns that mimics Washi Tape when stamped.  This card layout came from the Stampin' Success.

To get the Hey There Friend and Splatter stamps you need to become a member of My Paper Pumpkin.  My Paper Pumpkin is a monthly subscription with no contract so you can opt out at any time.  Every month you will get a kit of stamps, ink, paper, and embellishments to make a project. My Paper Pumpkin is only $20 a month (including shipping). And even better, if you sign up before August 31st, the first 2 months are only $10 (just use promo code pumpkin deal).  Go to https://mypaperpumpkin.com?demoid=2038542 to learn more and sign up!

Never have time to make your own?  My Paper Pumpkin is perfect because each project only takes up to 30 minutes of your time!  Don't have enough room to store all the crafting stuff?  This is perfect because it only comes with what you need for the project and the stamps are thin and clear, there is only one block, and the ink is 1"x1" Stampin' Spots so a small container is all you need!  Don't feel creative enough?  This is perfect because everything is precut and planned out for you with instructions so you only have to be creative if you want to!


Supplies:
Stamp Set(s) - My Paper Pumpkin Welcome Kit, Tape It
Card Stock - Whisper White, Early Espresso, Crumb Cake
Ink - Crumb Cake, Wild Wasabi, Marina Mist, Summer Starfruit, Early Espresso
Accessories - Wide Oval Punch, Decorative Label Punch, Linen Thread, Basic Rhinestones, Dimensionals

Tuesday, August 6, 2013

Washi Tape - Part 1

Over the next couple of posts I am going to show you how to add the Washi Tape effect to cards.  First, actually using Washi Tape!  Here is a cute card using the Epic Day Washi Tape. Washi Tape is a quick and easy way to add colorful embellishments to any card, scrapbook page, or gift!  If you have never used it before, it is basically a decorative masking tape. It comes in different colors, patterns, and widths.  When you buy it through Stampin' Up! You get three rolls that coordinated with each other, Stampin ' Up! Colors, and Designer Series papers.


Supplies:
Stamp Set(s) - Sweet Essential
Card Stock - Epic Day DS, Whisper White, Calypso Coral
Ink - Basic Gray
Accessories - Epic Day Washi Tape, Blossom Punch, Glue Dots, 7/8" Scallop Punch, Dimensionals

Thursday, August 1, 2013

July Downline Swaps

This week I hosted my downline meeting.  Our swap generated some beautiful cards!  The theme was the colors of Summer Starfruit, Pool Party, and Wisteria Wonder.  Check them out!


By Carol Johnson


By Kathy Johnson


By Dotti Hansen


By Sherri Barker


By Jill Perkins


By Marge McGuire


Thursday, July 25, 2013

Summer Flowershop

I just LOVE this card!  I got the inspiration for the layout from this card by Amy O'Neill.  The greatest thing about Stampin' Up! releasing the Dictionary Stamp when they retired the First Edition DS is that now you can have your print IN any color and ON any color!  Oh the possibilities!


Supplies:
Stamp Set(s) - Dictionary, Flowershop
Card Stock - Whisper White, Pool Party, Calypso Coral, Crushed Curry, Basic Black
Ink - Pool Party, Calypso Coral, Crushed Curry
Accessories - Itty Bitty Punch Pack, Pansy Punch, 1/8" Black Taffeta Ribbon, Basic Pearls, Glue Dots

Tuesday, July 23, 2013

Convention 2013 - Scrapbook Page Swap 2

For this group I had December.  Again, I designed this layout in My Digital Studio first and then assembled it from actual cardstock, stamps, and accessories.  It made it so much easier to move things around, change colors, and arrange the layout digitally before doing all the cutting and stamping for real.  For the decorative edges, I scored the paper using the Simply Scored and the Borders Plate, then cut the design out by hand. 


Supplies:
Stamp Set(s) - Ornamental Keepsakes, More Merry Messages
Card Stock - Real Red, Old Olive, Whisper White, Polka Dot DS
Ink - Real Red, Old Olive, Chocolate Chip, StazOn Black
Accessories - Big Shot, Top Note Die, Holiday Ornaments Framelits, 1/8" Real Red Taffeta Ribbon, Glue Dots, Brights Glimmer Brads, Paper Piercer, Simply Scored, Simply Scored Borders Plate

Monday, July 22, 2013

Convention 2013 - Scrapbook Page Swap 1

For my Scrapbook Swap I am in two different groups.  In each group there is someone assigned to each month so at the end of the swap everyone had a two page spread for each month of the year.  For this group I had November.  I actually designed both of my page spreads in My Digital Studio (MDS) and then assembled them with actual paper and product.  MDS is a great tool for planning and layouts, not just digitally scrapbooking.


Supplies:
Stamp Set(s) - Woodgrain
Card Stock - So Saffron, Early Espresso, Pumpkin Pie, Cherry Cobbler, Always Artichoke
Ink - So Saffron
Accessories - Big Shot, Bigz Alphabet Typeset, Bigz Autumn Accents, Cherry Cobbler Baker's Twine, Simply Scored, Simply Scored Borders Plate

Sunday, July 21, 2013

Convention 2013 - Simply Pressed Clay Swap

I got the inspiration for this card from Amy K.  I think the card is just gorgeous and a great display of the 5 new In Colors!


First I created all the flowers.


I then dyed them with a Stampin' Spritzer filled with alcohol and re-inker.  Some of the flowers only took two coats but the lighter colors took a couple more.  The dried pretty quickly.


When I stamped the flowers,  I first laid out a scrap of paper so to leave a void for my words.  I decided against using a label punch because there were so many layers already.


Here is a close up of the flowers after they are finished and on the card.


Supplies:
Stamp Set(s) - Serene Silhouettes , Loving Thoughts
Card Stock - Baked Brown Sugar, Coastal Cabana, Crisp Cantaloupe, Pistachio Pudding, Strawberry Slush, Whisper White
Ink - Pistachio Pudding, Baked Brown Sugar, Coastal Cabana, Crisp Cantaloupe, Strawberry Slush
Accessories - Big Shot, Top Note Die, Simply Pressed Clay, Simply Pressed Clay Molds, Stampin' Spritzer, Boho Blossoms Punch, Basic Rhinestones, Glue Dots, Sticky Strip