
I recently joined a new training program with Stampin' Up!. Part of this program is completing challenges related to my business. I was challenged to share my Stampin' Up! story with others. As I was sharing it with others directly I decided I also wanted to share it with you!
How I discovered Stamping and Stampin' Up!
Back in January of 2003, my mother invited me to a home workshop she was having. She said she had been to one before and it was this great product that you use to make cards and such. She was very excited so I decided to make the drive (2 hours) to come to this party she was having. When I arrived I was introduced to Stampin’ Up! My mom had around 10 women at her party and it was during Sale-A-Bration so for every $50 you spent you earned a free stamp set. We all had so much fun making a card and a cute little pencil holder for Valentine’s Day. I watched as my mother earned lots of free merchandise from her huge workshop. I had even purchased $50 worth of stuff to get a free set. My mom kept saying “You could do this, how much fun would it be”. I went home and thought about it for maybe a week then went onto the Stampin’ Up! website and found myself a local demonstrator to sign up under.
I have enjoyed every minute of my demonstratorship. I did take a year off to move from Ohio to Florida as it was too much to do both, but as soon as I got myself settled I signed up again so I could get back to doing what I loved so much! The people I have met and the fun I have had is worth so much to me. I can’t imagine my life without Stampin’ Up!
What do I love most about the Craft
I do cards, scrapbooking, and gifts with stamps but what I think I love most is sending a handmade card to someone when they least expect it. The reactions and smiles I get makes it all worth it. I have a list of everyone I work with and all our friends and family that I make sure to send birthday cards too. I also have a set of closest family and friends that I sent cards to for EVERY holiday and I mean every holiday (my last card sent was for the Chinese New Year) :) It makes them feel loved and remembered and that is what I want!
How did you come to discover Stamping and Stampin' Up? What do you love about the craft? I would love to hear from you!
Saturday, February 12, 2011
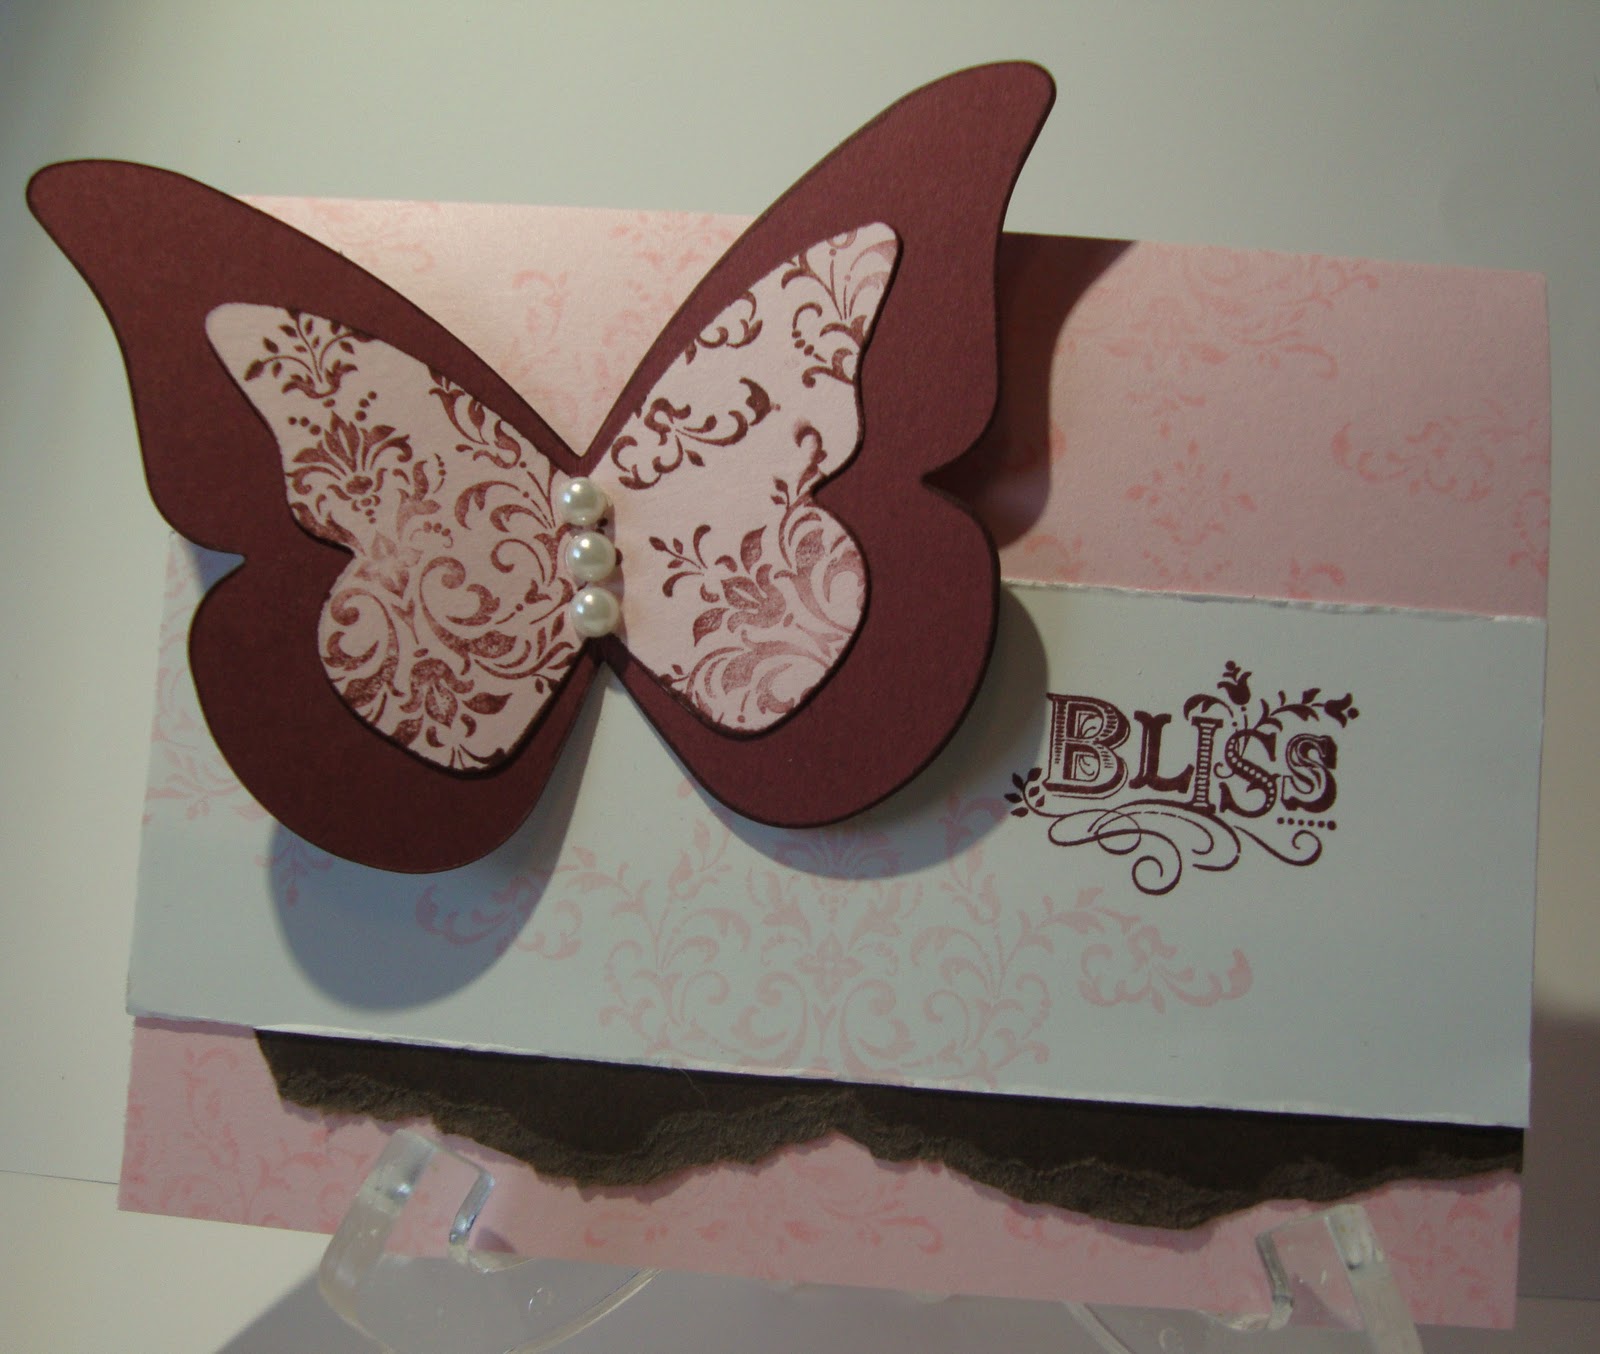
Blissful Butterfly
This is an all occasions card. I like to have a few of these laying around for those moments when you need a card for something unplanned (or forgotten). This card uses a set you can earn for FREE during Sale-A-Bration so make sure you don't miss out! I got the idea from Stampin Up demonstrator Jessica Luther.
Sale-A-Bration is going on now and ends March 31st. Don't miss out. Click here for more information on the FREE products you can earn!
The butterfly was cut out on the Big Shot and attached with a little Sticky Strip on the spine of the butterfly to make it look like it is going to fly away. It is hard to tell from the picture; however, the edges of the white are distressed using the bone folder. You just run the edge of the bone folder along the edge of the paper. More passes creates more distress.

Supplies:
Stamp Set(s) - Bliss (Sale-A-Bration set)
Card Stock - Bravo Burgundy, Pink Pirouette, Early Espresso, Whisper White
Ink - Pink Pirouette, Bravo Burgundy
Accessories - Big Shot, Bigz Beautiful Butterflies, Bone Folder, Sticky Strip, Basic Pearls
Sale-A-Bration is going on now and ends March 31st. Don't miss out. Click here for more information on the FREE products you can earn!
The butterfly was cut out on the Big Shot and attached with a little Sticky Strip on the spine of the butterfly to make it look like it is going to fly away. It is hard to tell from the picture; however, the edges of the white are distressed using the bone folder. You just run the edge of the bone folder along the edge of the paper. More passes creates more distress.
Supplies:
Stamp Set(s) - Bliss (Sale-A-Bration set)
Card Stock - Bravo Burgundy, Pink Pirouette, Early Espresso, Whisper White
Ink - Pink Pirouette, Bravo Burgundy
Accessories - Big Shot, Bigz Beautiful Butterflies, Bone Folder, Sticky Strip, Basic Pearls
Thursday, February 10, 2011
February Birthday
As you should know by now, every month I do a birthday card for each of my birthdays and it is themed around the month. Here is this months card. I actually got this idea from a demonstrator in a group I belong to here in Southwest Florida. We made a card like this a year ago and as I was flipping through my binder of cards past, I saw it and decided to change up the colors and resurrect the idea. That is why I always recommend keeping I of each card you make for yourself. It doesn't have to be a hard copy either. I use this blog as a record of ideas as well.
My little trick technique on this card is the triangle cut of the words banner. I have a hard time free hand cutting the shape so I use a square punch to do it for me!

Supplies:
Stamp Set(s) - Curly Cute
Card Stock - Rich Razzleberry, Pretty In Pink, Whisper White
Ink - Rich Razzleberry
Accessories - Big Shot, Scalloped Heart of Hearts Embosslit, Scallop Trim Border, 1-1/4 Square Punch (or scissors)
Tuesday, February 8, 2011
Defining Valentines Day
When I first laid eyes on the Occasions Mini Catalog, I knew I was buying the Valentine Defined set. I just loved it! And living in Florida made me desperately want the flamingos! Its a Florida Requirement. I dove in when I got it and made this card. I got the idea from the Stampin Up Demonstrator community from a demonstrator named Michele Reynolds. I am a huge fan!
It is a fairly simple card but with lots of layers. The hardest part is the bow. I actually just taped a hunk of ribbon around the cardstock and then once the card was all assembled, I tied a little bow and attached it with a glue dot. The small heart at the bottom is punched out of the Red Glimmer Paper. I am a HUGE fan as I love to add dimension, in this case textural, but hate to actually glitter as it is so messy!

Supplies:
Stamp Set(s) - Valentine Defined
Card Stock - Real Red, Basic Black, Whisper White, Red Glimmer
Ink - Basic Black, Real Red
Accessories - Small Heart Punch, Pinking Hearts Border Punch, 1/8" Black Taffeta Ribbon
Friday, February 4, 2011
Year of the Rabbit
Happy Chinese New Year! (one day late) Here is the card that I created for the new year. It was meant to post yesterday but I failed to schedule my posts. I was in a training this week and therefore was lining my posts to go without me but I forgot to actually set that up. FAIL
I bought the Kimono Kids stamp set as I fell in love with it. I of course saw the new year as a perfect time to use it. The background stamp is actually not Stampin Up but an Asian characters background that I found in some store. Everything else is Stampin Up. For the color on the card I used my ink pads and blender pen. I love the painted look it gives. The buttons are adhered with craft glue.

Supplies:
Stamp Set(s) - Kimono Kids
Card Stock - Basic Black, Real Red, Whisper White
Ink - Real Red, Wild Wasabi, Regal Rose, Marina Mist, Staz-on Black
Accessories - Designer Buttons Neutrals and Regals, Blender Pen, craft glue
Subscribe to:
Posts (Atom)


