As I mentioned in my last post, we had made another card with A Cardinal Christmas Stamp Set. Here is the second one. Again I am just in love with it!!!
The Pear Pizzazz in the background is just a 4-1/4 x 5-/12 piece of cardstock. I cut the Whisper White to 4 x 10⁻¹/2 and taped it on the Pear. The front bottom I tore and then folded up and tied the ribbon around it. It creates a neat detail and hides the ribbon wrap around. The Merry Christmas is actually stamped on the inside of the card.
Supplies:
Stamp Set(s) - A Cardinal Christmas
Card Stock - Pear Pizzazz, Whisper White
Ink - Pear Pizzazz
Accessories - 1/2" Pear Pizzazz Stitched-Poly Ribbon
Thursday, July 29, 2010
Tuesday, July 27, 2010
Holly Leaves
More Christmas! I am having so much fun! I got together with a friend this weekend to stamp Christmas Cards. We stamped all day while listening to Christmas music, now I am so in the spirit of Christmas!
I made this card with the A Cardinal Christmas Stamp Set. My friend had purchased it because she liked the holly leave in it. I have to admit, when I saw it in the catalog I was uninspired. But when I started playing with it I fell in love! Check out one of the adorable cards we made with it! (more to come later).
I love adding subtle details to the card. I think this came out beautiful with the white on white layering and the paper pierced holes underlining the Merry Christmas. The multiple colors in the holly leaf were achieved by markering the stamp.
Supplies:
Stamp Set(s) - A Cardinal Christmas
Card Stock - Poppy Parade, Whisper White
Ink - Pear Pizzazz, Poppy Parade markers
Accessories - 1/2" Pear Pizzazz Stitched-Poly Ribbon, Mat Pack, Paper Piercer, Glue Dots
I made this card with the A Cardinal Christmas Stamp Set. My friend had purchased it because she liked the holly leave in it. I have to admit, when I saw it in the catalog I was uninspired. But when I started playing with it I fell in love! Check out one of the adorable cards we made with it! (more to come later).
I love adding subtle details to the card. I think this came out beautiful with the white on white layering and the paper pierced holes underlining the Merry Christmas. The multiple colors in the holly leaf were achieved by markering the stamp.
Supplies:
Stamp Set(s) - A Cardinal Christmas
Card Stock - Poppy Parade, Whisper White
Ink - Pear Pizzazz, Poppy Parade markers
Accessories - 1/2" Pear Pizzazz Stitched-Poly Ribbon, Mat Pack, Paper Piercer, Glue Dots
Saturday, July 24, 2010
Snowflake Merry Christmas
Snow in the Summer! How fun! First, I apologize the pictures are dark. Second, I would love your opinion! I am not sure if I like this card or not. I really like the Top Note Die Cut and what is stamped on it, I just think the white background-even with it stamped-doesn't work. I tried some embossed backgrounds but it felt like too much. It might be that I am just so used to putting ribbon on everything, I don't know what to think when it is absent. Thoughts?
I definitely had fun with the large snowflake. Details are great! I am thinking of adding the smallest pearls to each of the points of the diamonds instead of the white dots. I love Bling!!!
Supplies:
Stamp Set(s) - Serene Snowflakes
Card Stock - Whisper White, Bashful Blue
Ink - Marina Mist, Bashful Blue
Accessories - White Gel Pen, Big Shot, Top Note Die, Basic Pearls
I definitely had fun with the large snowflake. Details are great! I am thinking of adding the smallest pearls to each of the points of the diamonds instead of the white dots. I love Bling!!!
Supplies:
Stamp Set(s) - Serene Snowflakes
Card Stock - Whisper White, Bashful Blue
Ink - Marina Mist, Bashful Blue
Accessories - White Gel Pen, Big Shot, Top Note Die, Basic Pearls
Wednesday, July 21, 2010
Happy Holidays Christmas Tree
Christmas continues! This is another great card in which the idea came from the catalog (pg. 31). I just love how the set up this two page spread to show you how everything can coordinate! They even did the thinking with the color combinations!
In this card I used the technique Masking. For the Large Cherry Cobbler Orniment and the Narrow Daffodil Delight Orniment I stamped them on paper and cut them out. Then I stamped them where I wanted them on the tree. Before staming the Small Orniment I covered the other Oriment with the cut out mask. This gives the effect that something is behind something else. VERY EASY!
Supplies:
Stamp Set(s) - Holiday Happiness
Card Stock - Old Olive, Very Vanilla
Ink - Old Olive, Daffodil Delight, Cherry Cobbler
Accessories - None
In this card I used the technique Masking. For the Large Cherry Cobbler Orniment and the Narrow Daffodil Delight Orniment I stamped them on paper and cut them out. Then I stamped them where I wanted them on the tree. Before staming the Small Orniment I covered the other Oriment with the cut out mask. This gives the effect that something is behind something else. VERY EASY!
Stamp Set(s) - Holiday Happiness
Card Stock - Old Olive, Very Vanilla
Ink - Old Olive, Daffodil Delight, Cherry Cobbler
Accessories - None
Sunday, July 18, 2010
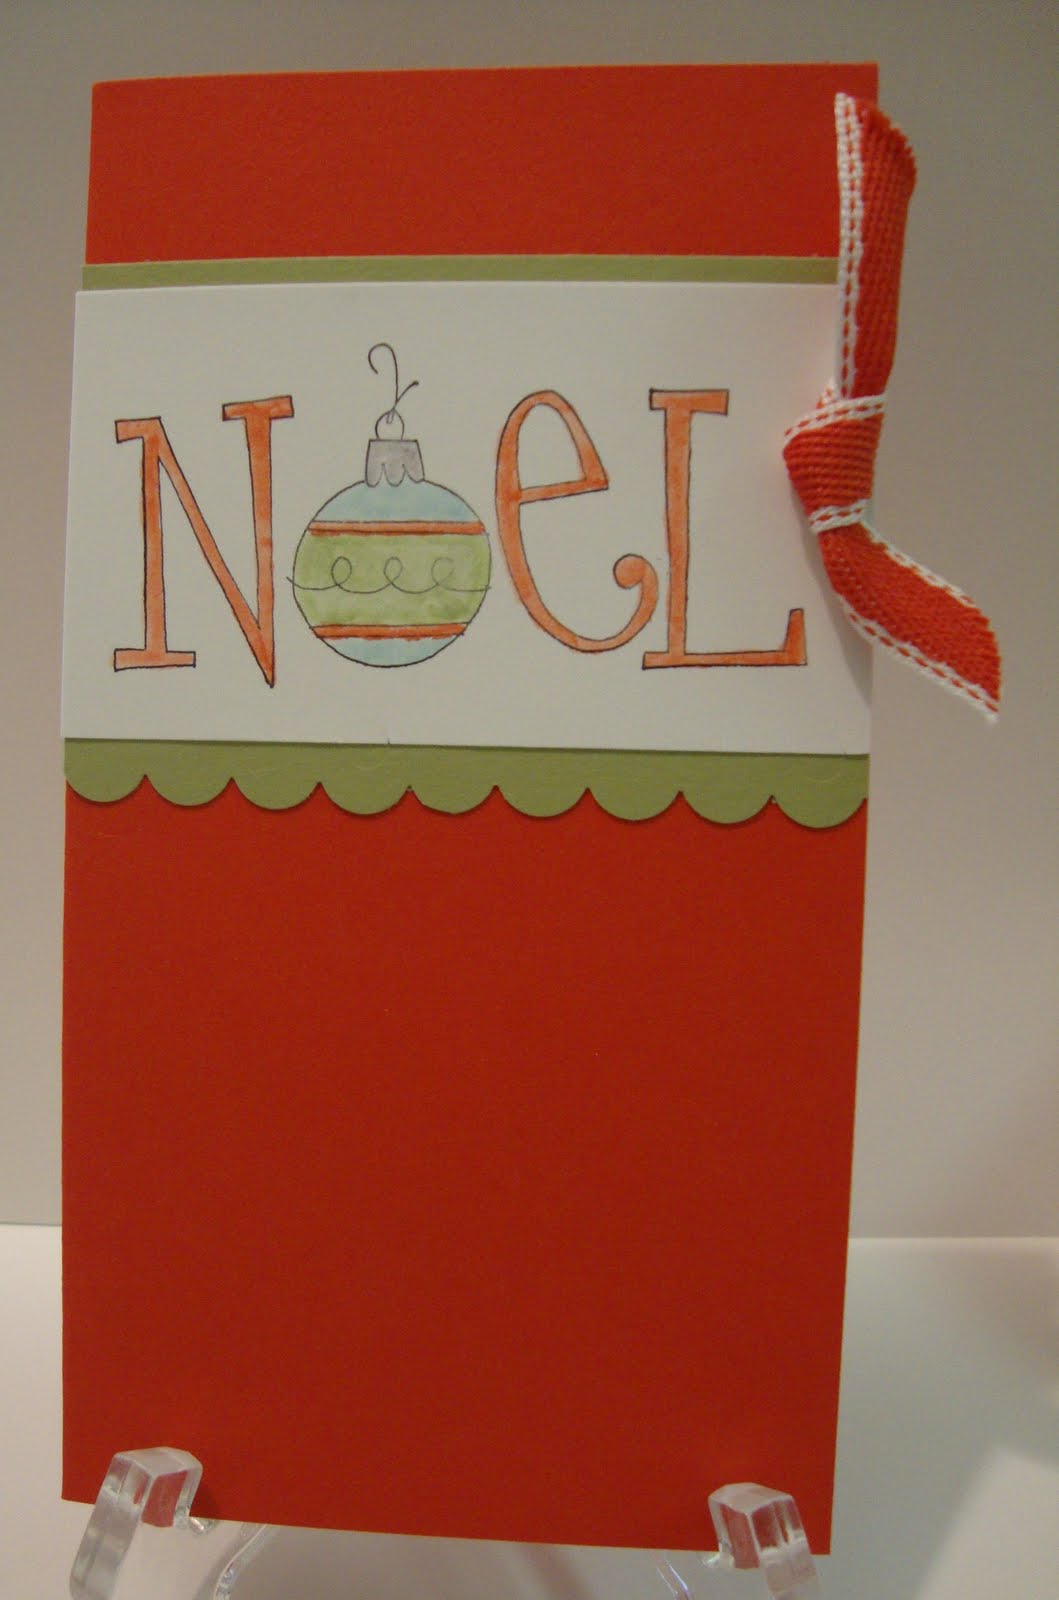
Noel Big On Christmas
My Christmas in July has finally begun. This first card I got from pg 32 from the Idea Book & Catalog. I love using the catalog for ideas!
This is a simple card. The base dimensions are 6-1/2" x 3-1/2". The Noel is "painted" in with ink and a blender pen. One of my favorite techniques, it looks like you have painted!
Supplies:
Stamp Set(s) - Big On Christmas
Card Stock - Poppy Parade, Pear Pizzaz, Whisper White
Ink - Basic Black, Poppy Parade, Pear Pizzaz, Baja Breeze
Accessories - 1/2" Poppy Parade Stitched-Poly Ribbon, Scallop Edge Border, Blender Pen
This is a simple card. The base dimensions are 6-1/2" x 3-1/2". The Noel is "painted" in with ink and a blender pen. One of my favorite techniques, it looks like you have painted!
Supplies:
Stamp Set(s) - Big On Christmas
Card Stock - Poppy Parade, Pear Pizzaz, Whisper White
Ink - Basic Black, Poppy Parade, Pear Pizzaz, Baja Breeze
Accessories - 1/2" Poppy Parade Stitched-Poly Ribbon, Scallop Edge Border, Blender Pen
Friday, July 9, 2010
New Demonstrator Gifts
How terrible am I. I keep promising more posts but I keep slacking. My order of Christmas stuff arrives on Monday (I am so EXCITED!) then Christmas in July will officially begin! Until then, I wanted to show you the cute things I give newly signed demonstrators.
The Nail File and Pen are some of the cute things you can purchase from Stampin' Up! if you are a Demonstrator. There are all sorts of logo items available!
The Just a Note calendar I actually got from Andrea Walford. Here is a look at the inside.
I just used some scrap DS paper I had and some matching ribbon and buttons. It is super easy to assemble and makes are really great gift. I purchased the calendar and paper from Andrea, the pen from an office supply store and the tin from http://www.dunwoodybooth.com/
The notebook is also a really cute and simple gift.
I used Bravo Burgundy, More Mustard, and Very Vanilla Cardstock on a small Composition notebook I picked up at the dollar store. (I also put a piece of Bravo Burgundy on the back). Using Bravo Burgundy and More Mustard Ink and the Not To Self Stamp Set (retired) I decorated the front.
Until next time, enjoy!
The Nail File and Pen are some of the cute things you can purchase from Stampin' Up! if you are a Demonstrator. There are all sorts of logo items available!
The Just a Note calendar I actually got from Andrea Walford. Here is a look at the inside.
I just used some scrap DS paper I had and some matching ribbon and buttons. It is super easy to assemble and makes are really great gift. I purchased the calendar and paper from Andrea, the pen from an office supply store and the tin from http://www.dunwoodybooth.com/
The notebook is also a really cute and simple gift.
I used Bravo Burgundy, More Mustard, and Very Vanilla Cardstock on a small Composition notebook I picked up at the dollar store. (I also put a piece of Bravo Burgundy on the back). Using Bravo Burgundy and More Mustard Ink and the Not To Self Stamp Set (retired) I decorated the front.
Until next time, enjoy!
Labels:
Gift
Thursday, July 1, 2010
Watercolor Wishes
Today is the launch of the NEW 2010-2011 Idea Book and Catalog! Be sure to check it out! I just LOVE it and have already submitted my first order!
Another great idea for you! I know I got to figure out how to get better lighting on my pictures. Sorry about that! I got the idea for this card here. I changed up the colors to Concord Crush, Perfect Plum, and Daffodil Delight. Sadly the Concord Crush looks blue in my picture :( I love the Watercolor Trio set because it looks like more work went into it than actually does!
Supplies:
Stamp Set(s) - Watercolor Trio
Card Stock - Concord Crush, Perfect Plum, Whisper White
Ink - Concord Crush, Perfect Plum, Old Olive, Daffodil Delight
Accessories -Perfect Polka-Dot Embossing Folder, Big Shot, Two Tags Bigz Die, 1-3/4" Scallop Circle Punch, 1-3/8 Circle Punch, 1/8" Daffodil Delight Taffeta Ribbon
Another great idea for you! I know I got to figure out how to get better lighting on my pictures. Sorry about that! I got the idea for this card here. I changed up the colors to Concord Crush, Perfect Plum, and Daffodil Delight. Sadly the Concord Crush looks blue in my picture :( I love the Watercolor Trio set because it looks like more work went into it than actually does!
Supplies:
Stamp Set(s) - Watercolor Trio
Card Stock - Concord Crush, Perfect Plum, Whisper White
Ink - Concord Crush, Perfect Plum, Old Olive, Daffodil Delight
Accessories -Perfect Polka-Dot Embossing Folder, Big Shot, Two Tags Bigz Die, 1-3/4" Scallop Circle Punch, 1-3/8 Circle Punch, 1/8" Daffodil Delight Taffeta Ribbon
Subscribe to:
Posts (Atom)