Saturday, January 30, 2010

Vintage Vogue Embossing Tutorial

Today's card is a CASE from this card done by Susan Farrant.  I fell in love with it as soon as I laid eyes on it and knew I had to do one of my own.  I created this card for a swap I was participating in.  The theme was Occasions and Sale-A-Bration mini catalogs so it fit perfectly!  I am doing a tutorial on it as I just love the techniques used here and wanted everyone to be able to successfully recreate this beautiful card!

Let's Get Started!  Here is the card we are making.

First, cut all the pieces needed.  I am over organized and I like to do all the cutting at once so I can move the cutting system away and focus on the art.  The Night of Navy is cut as a traditional card.  The Whisper White is cut at 4x5-1/4.

Rub an Embossing Buddy over the Whisper White Cardstock.  This will help ensure only what you want to stick actually sticks to your card.

Then stamp the flower onto the Whisper White cardstock using Whisper White Craft Ink.  It is hard to see now but give me time...


Shake Clear Embossing Powder over the flower tapping off the extras and then heat set the image.


Using a Sponge Dauber and Night of Navy Ink, Sponge over the flower to highlight it.  When finished, use a tissue to wipe off excess ink from the embossed image.  The Embossing with resist the ink.


Stamp the vine in Night of Navy and then onto the card overlapping the flower some.  Again, use a tissue to rub off excess ink from the embossing.


Finish off the Whisper White Cardstock by stamping a saying in Night of Navy along the bottom edge of the card and tying some ribbon along the edge.


Glue the Whisper White onto the Night of Navy card base.


Doesn't it look beautiful!  As an added touch I put Whisper White on the inside of the card (as it is hard to write on Night of Navy) and stamped a cute little flower in the bottom corner.  I love the added touches.


Supplies:
Stamp Set(s) - Vintage Vogue
Card Stock - Night of Navy, Whisper White
Ink - Craft White, Night of Navy
Accessories -1/4" Night of Navy Grosgrain Ribbon, Clear Blocks, Embossing Buddy, Clear Embossing Powder, Heat Tool, Powder Pal, Sponge Dauber

Friday, January 29, 2010

Swaps to Show

I had a wonderful Demonstrator meeting last night and I wanted to show you the great swaps I got to take home with me!  Our theme was Occasions and Sale-A-Bration Mini Catalog products.  These ladies are Talented!  Visit me tomorrow to see a tutoral on the card I swapped.

Created my Anne Marie. 

Created by Marcy Walsh


Created by Barbara Pelak


Created by Lynn Corr


Created by Lisa Reber


Created by Jennifer

Thursday, January 28, 2010

Non-Standard Valentine Card

Here is a non-standard Valentine's Card.  I was working with my new set With All My Heart for the current Occasions Mini Catalog and realize that all my cards were with Real Red and Pretty In Pink.  So I visited the new Demonstrator Stampin' Community and found a card that used Bashful Blue and Chocolate Chip.  I fell in love and adapted it to make this one.  Sorry for the glare, I had put it in a cello bag then realized I didnt take a picture! 


Demonstrator Tip.  I love to create 4 or 5 cards made from a stamp set that I am demoing.  I put them in a cello bag with a topper that names the set, tells what page it is on in the catalog, and how much it costs.  On the back I stamp out each of the images that are included in the set.


Supplies:
Stamp Set(s) - With All My Heart
Card Stock - Bashful Blue, Chocolate Chip, Whisper White
Ink - Bashful Blue
Accessories - Big Shot, Two Tagz Die, Scallop Circle Punch, 1 3/8" Circle Punch, 1/1/2" Circle Punch, Clear Blocks, Scallop Edge Punch, Playground Designer Buttons

Wednesday, January 27, 2010

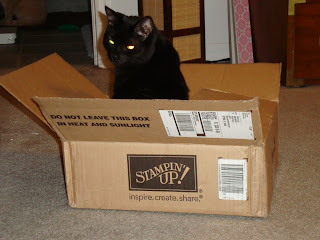
I'm not the only one that love Stampin' Up! Deliveries

I just had to share.  My girls are so cute!  Last night I got my toys out of the box and while I played with my toys, my girls played with theirs.


Bagheera


Meeko


Rajah


Toulouse


The name story.  I am a HUGE fan of Disney; therefore, all the girls are named for Disney Characters.
Bagheera - Panther in Jungle Book
Rajah - Jasmine's Tiger in Aladdin
Meeko - Raccoon in Pocahontas (she is a klepto when it comes to food so the name fit)
Toulouse - One of the kittens in Aristocats.

Now you've met my children!  Come back tomorrow for another card post.

Monday, January 25, 2010

In Color Love Bug

I just love the Love Bug set.  I found this cute card on the new Demonstrator Connection website.  This site is similar to facebook but is a community of just Stampin' Up! Demonstrators.  Another great reason to join Stampin' Up!  Dont forget that if you join Stampin' Up! now you can get your Starter Kit for 15% off AND get an extra stamp set from the catalog FREE.  Go to my website now to join.  The password is nicolebstampin.

Sorry for the glare on the picture, I had this card in a plastic bag.  I used the In Color markers to color this little bug.  It is a very simple (not a lot of stuff going on) but I tend to like my cards that way. 


Supplies:
Stamp Set(s) - Love Bug, Short & Sweet
Card Stock - Crushed Curry, Rich Razzleberry, Whisper White
Ink - Basic Black; Crushed Curry, Rich Razzleberry Markers
Accessories - 1/2" Polka-Dot Rich Razzleberry Grosgrain Ribbon, Modern Label Punch

Sunday, January 24, 2010

Workshop Pictures

Yesterday I had a wonderful workshop at the home of one of my customers.  I had a GREAT time and I believe everyone that came did as well.  I got to meet many new people and I look forward to seeing them all again.  I wanted to share some pictures with you.  I actually was able to get pictures because I brought along, Fatima, a great girl that will be joining the Stampin' Up! team very soon.  She was a great extra set of hands and remembered to take pictures :)  Thanks Fatima!


Saturday, January 23, 2010

Love Bug Sequel

Okay, I know you have seen this one before (to refresh your memory go here).  But I just love it and wanted to show you it colored with the white gel pen how I do it and not how my mother did it.


Supplies:
Stamp Set(s) - Love Bug, Short & Sweet
Card Stock - Pumpkin Pie, Whisper White
Ink - Basic Black
Accessories -1 3/8" Square Punch, Signo Gel Pen, Scallop Trim Border, 1/2" Pumpkin Pie Striped Grosgrain Ribbon, Dimensionals

Thursday, January 21, 2010

Haiti Relief and Development Fund

This is my second post today so be sure to scroll down to see my card for today.

From now until February 28, 2010, $2 from every I {Heart} Hearts stamp set sold will be donated American Red Cross’ Haiti Relief and Development Fund. The Red Cross is already well-established in Haiti, and this money will be used to provide immediate relief and long-term support through supplies, technical assistance and other support to help those in need.

118571   I {Heart} Hearts – clear-mount (block D recommended) $18.95

117010   I {Heart} Hearts – wood-mount  $26.95

Contact me today to place your order or go to my website and select Shop Now in the top right hand corner to order online.

February Birthday Card

I have been trying since about August last year to make all the birthday cards I need for the next month by the middle of the month.  I even fill them out and prep the envelopes, then when I see the birthday approaching I just toss them in the mail.  I have been pretty successful so far.  This post is my birthday card for February. 

I know, I have been using this set ALOT.  I can't resist, I just LOVE it!  I am really happy with how this card came out.  It is a little hard to tell in the picture but I used the small butterfly and the flower along the right edge of the card.  The butterfly is popped out with my usual technique.  I just put a strip of Sticky Strip on the body of the butterfly and then bent up the wings along the edge of the tape.  The image below the punched butterfly is the solid butterfly stamped on the paper first.  Hope you enjoy.

Supplies:
Stamp Set(s) - Flight of the Butterfly
Card Stock - Real Red, Pink Pirouette (retired), Whisper White
Ink - Real Red
Accessories - Filigree Brads, 3/4" Real Red Grosgrain Polka Dot Ribbon, Butterfly Punch, Sticky Strip, 1/16" Circle Punch

Monday, January 18, 2010

January Stamp-A-Stack

Saturday was my monthly Stamp-A-Stack.  I have a great time with my girls.  I absolutely love getting together with others and making a bunch of cards!  Check out this month's projects.
I had a lot of fun making the cards for the class, but I will admit they were all CASEd (some exactly).  I am still learning to trust my instincts so I still use ideas I see from some of my wonderful bloggers I follow.  All these ideas came from one lady, Ruth.  She is very talented.  Check out her blog.

This first card (Butterfly Friends) I found here.  I am in love with the Beautiful Wings Embosslit!  Not only does it punch them out but it Embosses on the too.  I used two different colors, Pretty In Pink and Very Vanilla.  After I used the Big Shot, I rubbed a sponge dauber in Pretty In Pink ink and sponged over them.  The embossing grabbed the ink to highlight it even more.  My customers also had fun with the clear block stamps.  I had precut all the cardstock so they used the clear blocks for stamp the saying.  Everyone got it straight!  It is a little hard to tell from the picture but the DS paper I used had glitter, what a nice touch that adds to the card!


Supplies:
Stamp Set(s) - Vintage Vogue
Card Stock - Real Red, Pretty In Pink, Very Vanilla, Sending Love DS
Ink - Pretty in Pink
Accessories -Big Shot, Beautiful Wings Embosslit, Scallop Trim Border Punch, Sponge Daubers, Dimensionals, 1 1/4" Square Punch, 1 3/8" Square Punch, Clear Blocks

My Second Card (Life Happens) came from here.  When I saw this card I just fell in love and had to make it myself.  I changed up the colors some from the original.  I LOVE the color blue so it probably helped to draw me to this card.  I want to make a 100 of them and send them to everyone I know; however, the flower is hand cut out so I will not be making that many ;) 


Supplies:
Stamp Set(s) - Vintage Vogue, Very Vintage Wheel Jumbo
Card Stock - Brilliant Blue, Kraft, Whisper White
Ink - Brilliant Blue, Jumbo Brilliant Blue Cartridge
Accessories -Clear Block, Paper Snips, 5/8" Satin Ribbon Bashful Blue, Vintage Brads, Jumbo Handle, Dimensionals, Scallop Edge Punch

The last card (Friends) came from here.  I found this card long ago and loved it so I tucked the idea way for a time when I could use it.  This was the first card I made when I got the Big Shot for Christmas.  It was also the very first time using my clear block stamps.  I was quick and careless and managed to get the saying crooked despite having a flawless method of getting it straight :D  I used the DS paper again to add glitter to the card (LOVE this paper!)


Supplies:
Stamp Set(s) - With All My Heart
Card Stock - Whisper White, Real Red, Pretty in Pink, Sending Love DS
Ink - Real Red
Accessories -Big Shot, Bigz Two Tags, Clear Blacks, 1 1/4 Punch Circle, 1 3/8 Punch Circle, Scallop Circle Punch, 1/16" Punch Circle, 3/8" White Taffeta Ribbon

Saturday, January 16, 2010

Thank You Card

Earlier in the week I mentioned that I created 3 cards for a color challenge but only posted 2 of them.  Well here is the other card.  I ended up sending it to the owner of the company I work for to thank him for giving all of us the week between Christmas and New Years off.  It was unprecedented and very generous and I wanted to thank him for it.  Plus he is going though a lot right now and I wanted to show him that I supported him.

I used the Naturally Serif Alphabet along with the Big Shot that I got for Christmas to do the lettering.  I used the Paper-Piercing Tool along the top of the white for an accent.  The Designer Series Paper on the card is from the Patterns Pack of Paper you can earn for free if you host a workshop.  Click Here to book your workshop today.


Supplies:
Card Stock - Chocolate Chip, Really Rust, Patterns Pack Designer Series Paper III, Whisper White
Accessories - Big Shot, Naturally Serif Alphabet, Paper-Piercing Tool, Mat Pack, Scallop Edge Punch

Thursday, January 14, 2010

Flight of the Butterfly Pretties

I needed a card for someone that was down in the dumps and decided that the saying from Flight of the Butterfly was perfect for the occasion. "If nothing ever changed there would be no butterflies-unknown". Haven't we all be there. I am a firm believer in 'Everything happens for a Reason'. Some of the best things in my life have come from terrible events pointing the way.

This card is a very simple card but I just think it is very elegant and gets the point across. I know I would feel better just by looking at it :) The card base is Sage Shadow; however, I put a piece of Soft Suede on the inside of the cover to give the layered look at the bottom.


Supplies:
Stamp Set(s) - Flight of the Butterfly
Card Stock - Sage Shadow, Whisper White, Soft Suede
Ink - Sage Shadow, Handsome Hunter
Accessories -Pretties Kit, 1/2" Polka-Dot Grosgrain Soft Suede Ribbon, Scallop Edge Punch

Tuesday, January 12, 2010

Challenge Submission

Those who follow me on Twitter (http://twitter.com/nicolestamper) know that I have decided to start participating in challenges.  I think that it will give me more to be creative with then just prepping for classes and holidays.  I am very excited!  The first challenge I am going to do is this one.

It was a long day at work yesterday and when I finally got home in the evening I was so excited to relax and stamp I went a little crazy with ideas.  I ended up making 3 cards that met the requirements of the challenge.  The requirements are to use Chocolate and Orange.  One of the cards I decided to cut and will show you it another day.  The other 2 I just couldn't decide between so I have posted both here.  Maybe she will consider both :) 

The first card is a simple card, which tend to be my favorite.  I used Pumpkin Pie as the base of the 4x4 card.  The flower is Fleurettes II and a Chocolate Chip Corduroy Button.  The saying is a rub-on.


Supplies:
Card Stock - Pumpkin Pie
Accessories -5/8" Chocolate Chip Grosgrain Ribbon, Greatest Moments Rub-ons (retired), Chocolate Chip Corduroy Button, Fleurettes II

The Second card has some detail that the picture does not do justice.  I used textured Chocolate Chip Cardstock for the card base.  Around the entire edge of the card I paper pierced a border.  In the center I used punches and accessories to give the card dimension.  For the saying, I again used Rub-Ons.


Supplies:
Stamp Set - Flight of the Butterfly
Card Stock - Pumpkin Pie, Whisper White, Chocolate Chip textured
Ink - Pumpkin Pie
Accessories - Pretties Kit, Butterfly Punch, Designer Label Punch, Clear Rhinestone Brads, Paper-Piercing Tool, Mat Pack, Greatest Moments Rub-Ons (retired)

Monday, January 11, 2010

Butterfly Scrapbook Page

I LOVE to Scrapbook but I must admit that I am Way behind. I was married last May and I am still at the beginning phases of scrapbooking the event. My husband teases me because I have all these started scrapbooks (our wedding, our dating years, mini scrapbooks, etc) but have not seemed to be able make much progress. I find myself stopping my projects to make gifts and books for others. Of course I love doing those too! I wish that I could find a group of people like me that would like to get together once or twice a month to scrapbook and socialize. I also wouldn't mind having more hours in a day :D

For today's project I have created a cute, simple 6x6 scrapbook page. Then I will show you how to make that 6x6 page into a 12x12 page. I am a big fan of the 6x6 scrapbook. They are great to carry around and show off your pictures. I also realize that some events just can not truly be displayed on a small page.

This page is very simple with some dimension added with the fly away butterfly. I punched the butterfly out twice from Certainly Celery, one I stamped with one of the stamps from Flight of the Butterfly (the Butterfly Punch works perfectly with this set). I taped the plain butterfly down. Then I put a piece of Sticky Strip on the body of the stamped butterfly. I glued it down then folded up the wings. I love using this technique. See this used on a card here.

Here is a completed 12x12 page using the 6x6 page above. This will be the first page of my Honeymoon album if I can ever get it completed :D One page down.... The lettering is the Naturally Serif Alphabet for the Big Shot. I love doing journaling creatively whenever possible, I think it adds so much to a page. It is hard to tell in the picture; however, I did the same flowers along the corner of the 12x12 page using So Saffron that I did on the 6x6 page.


Supplies:
Stamp Set(s) - Flight of the Butterfly
Card Stock - Bashful Blue, Certainly Celery, Rose Red, So Saffron
Ink - Certainly Celery, Bashful Blue, So Saffron, Basic Black Stampin' Write Marker
Accessories -Butterfly Punch, Curly Label Punch, Sticky Strip, Big Shot, Naturally Serif Alphabet